Minecraft, a game beloved by millions, is playable on nearly every device, including Chromebooks. These handy devices operate on Chrome OS, but due to the system's unique nature, many users question whether Minecraft can indeed be played on a Chromebook. The answer is a resounding yes!
In this comprehensive guide, we'll walk you through the installation process and share tips for optimizing performance.
Table of Contents
- General Information About Minecraft on a Chromebook
- Enabling Developer Mode
- Installing Minecraft on Chromebook
- Running the Game
- How to Play Minecraft on a Chromebook with Low Specs
- Enhancing Performance on Chrome OS
General Information About Minecraft on a Chromebook
To ensure smooth gameplay, your Chromebook should meet these minimum requirements:
- System Architecture: 64-bit (x86_64, arm64-v8a)
- Processor: AMD A4-9120C, Intel Celeron N4000, Intel 3865U, Intel i3-7130U, Intel m3-8100Y, Mediatek Kompanio 500 (MT8183), Qualcomm SC7180 or better
- RAM: 4 GB
- Storage: at least 1 GB of free space
If your device struggles to run the game smoothly, don't worry; we'll cover performance enhancement tips later in this article. Now, let's dive into the installation process. You can directly install the Bedrock Edition from the Google Play Store, which is straightforward: open the store, search for Minecraft, and navigate to its page. Note that it costs $20, but if you already own the Android version ($7), you'll only need to pay an additional $13. This method is ideal for those seeking a quick setup.
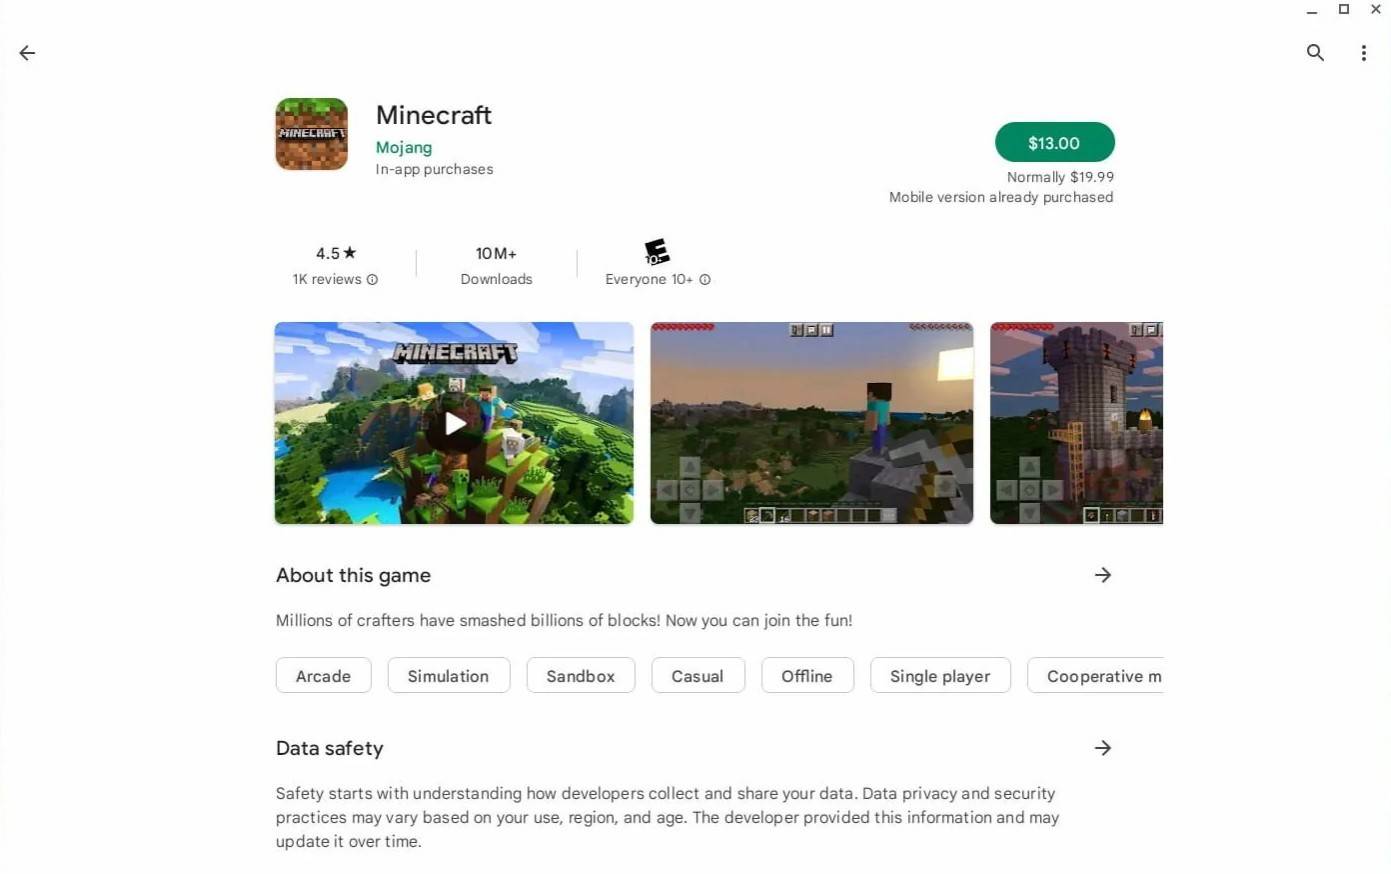 Image: aboutchromebooks.com
However, if the Bedrock Edition isn't your preference, you're in luck because Chrome OS is based on Linux, and Minecraft has been available for Linux for quite some time. Installing it will require careful attention due to the differences from Windows, and some coding will be involved. We've prepared a detailed guide to help you get Minecraft running on your Chromebook in just half an hour.
Enabling Developer Mode
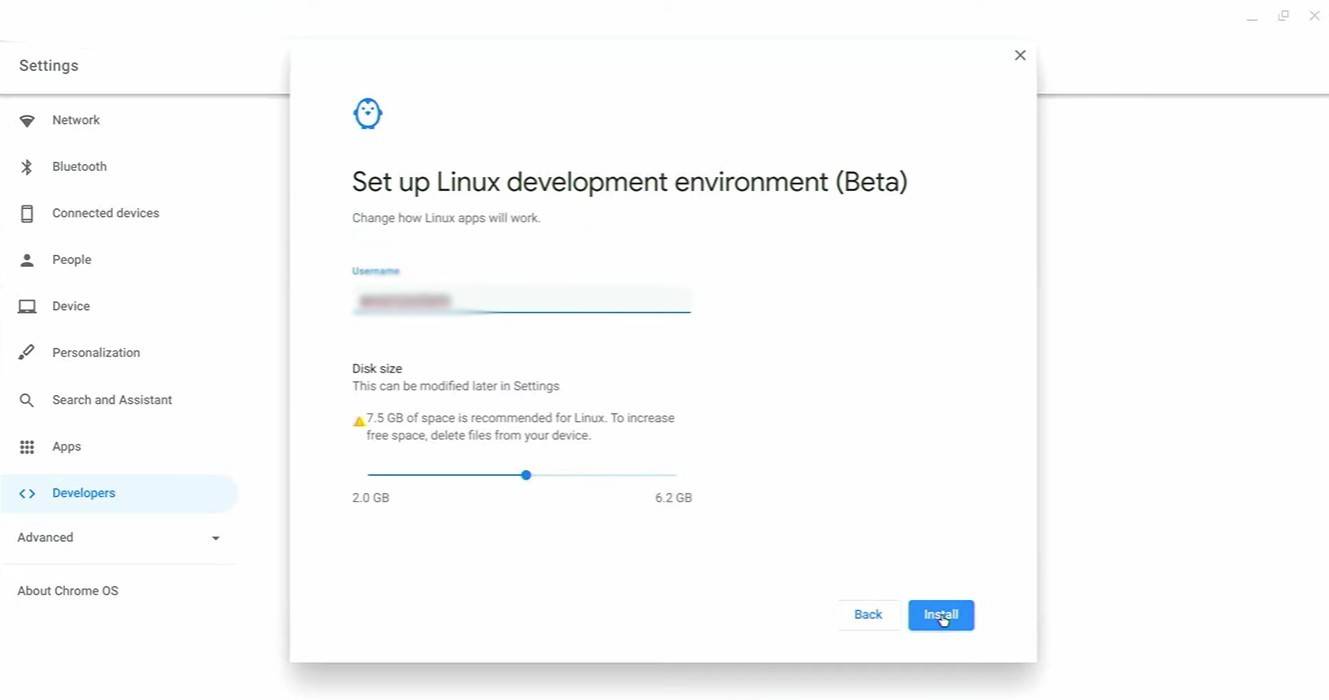 Image: youtube.com
To begin, you must enable Developer Mode to signal to Chrome OS that you're ready to tinker. Navigate to the settings menu through the equivalent of the "Start" menu and find the "Developers" section. Enable the "Linux development environment" option, follow the on-screen instructions, and once completed, the Terminal will open. This is where you'll input commands similar to the Windows command prompt.
Installing Minecraft on Chromebook
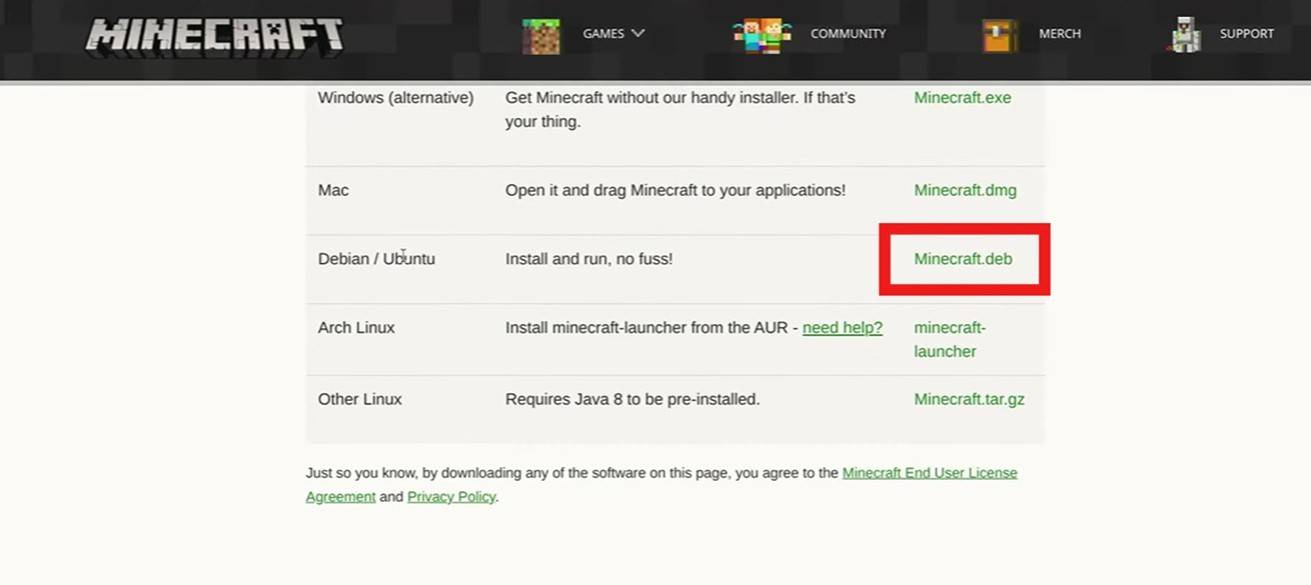 Image: youtube.com
With Developer Mode enabled, you're now ready to install Minecraft. Stay tuned for the next steps in our guide to bring the world of Minecraft to your Chromebook.